Last updated on March 12th, 2024
Are you someone who loves to do things yourself, especially when it comes to electronic projects? Do you sometimes struggle with not having enough space or dealing with big parts? Well, don’t worry anymore! The Arduino Nano is here to save the day.
Imagine a tiny but super powerful tool that can completely change how you work on electronics. That’s exactly what the Arduino Nano is. It’s small, but it packs a punch.
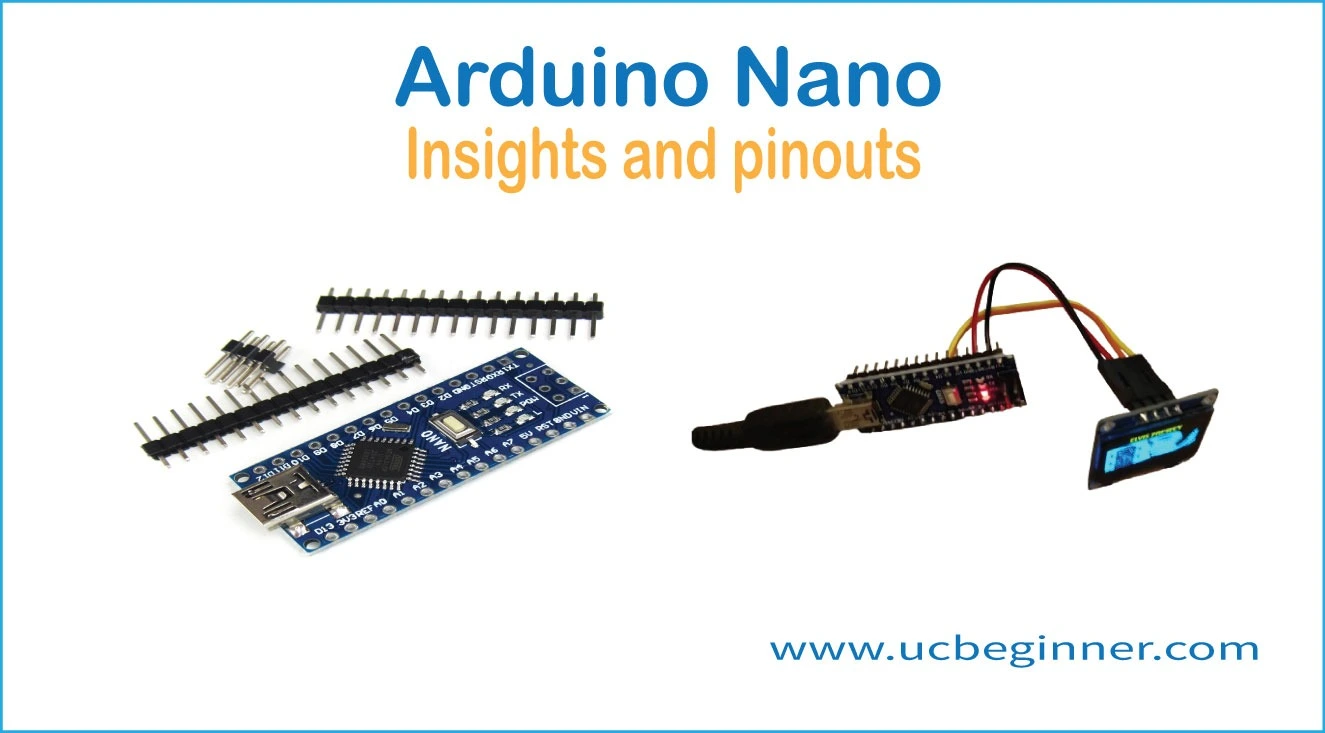
In a world where space is tight and big parts can be a problem, the Arduino Nano is like a breath of fresh air. It gives you everything you need in a compact size. Now, you can let your creativity run wild without being held back by bulky hardware. Thanks to the Arduino Nano, your DIY dreams can become a reality, no compromises needed.
Arduino Nano Basics
Features and Technical Specifications
The Arduino Nano is an excellent choice for both beginners and experienced makers due to its compact size and versatile features. Here are some key points to consider:
- The microcontroller used in the Arduino Nano is the ATmega328P, which is the same as the popular Arduino Uno.
- It operates at a voltage of 5V, with a recommended input voltage range of 7-12V.
- It has 14 digital I/O pins, including 6 that provide PWM output, as well as 8 analog input pins.
- Each I/O pin can handle a DC current of up to 20 mA, and the 3.3V pin can handle up to 50 mA.
- The flash memory is 32 KB, SRAM is 2 KB, and EEPROM is 1 KB.
- The clock speed is 16 MHz.
Here’s a brief overview of the Arduino Nano board:
- Microcontroller: ATmega328
- USB connector: Mini-B USB
- Built-in LED: Pin 13
- Digital I/O pins: 14
- Analog input pins: 8
- PWM pins: 6
- Communication interfaces: UART (RX/TX), I2C (A4 for SDA, A5 for SCL), SPI (D11 for COPI, D12 for CIPO, D13 for SCK)
- Power: Operating voltage is 5V, with a recommended input voltage of 7-12V
- Clock speed: 16 MHz
- Memory: 2KB SRAM, 32KB Flash, 1KB EEPROM
For more detailed technical specifications, you can refer to the official Product Reference Manual available at this link: Arduino Nano Product Reference Manual
Schematics
Exploring the schematics of the Arduino Nano can give you a better understanding of how it works.
Arduino Nano PINs
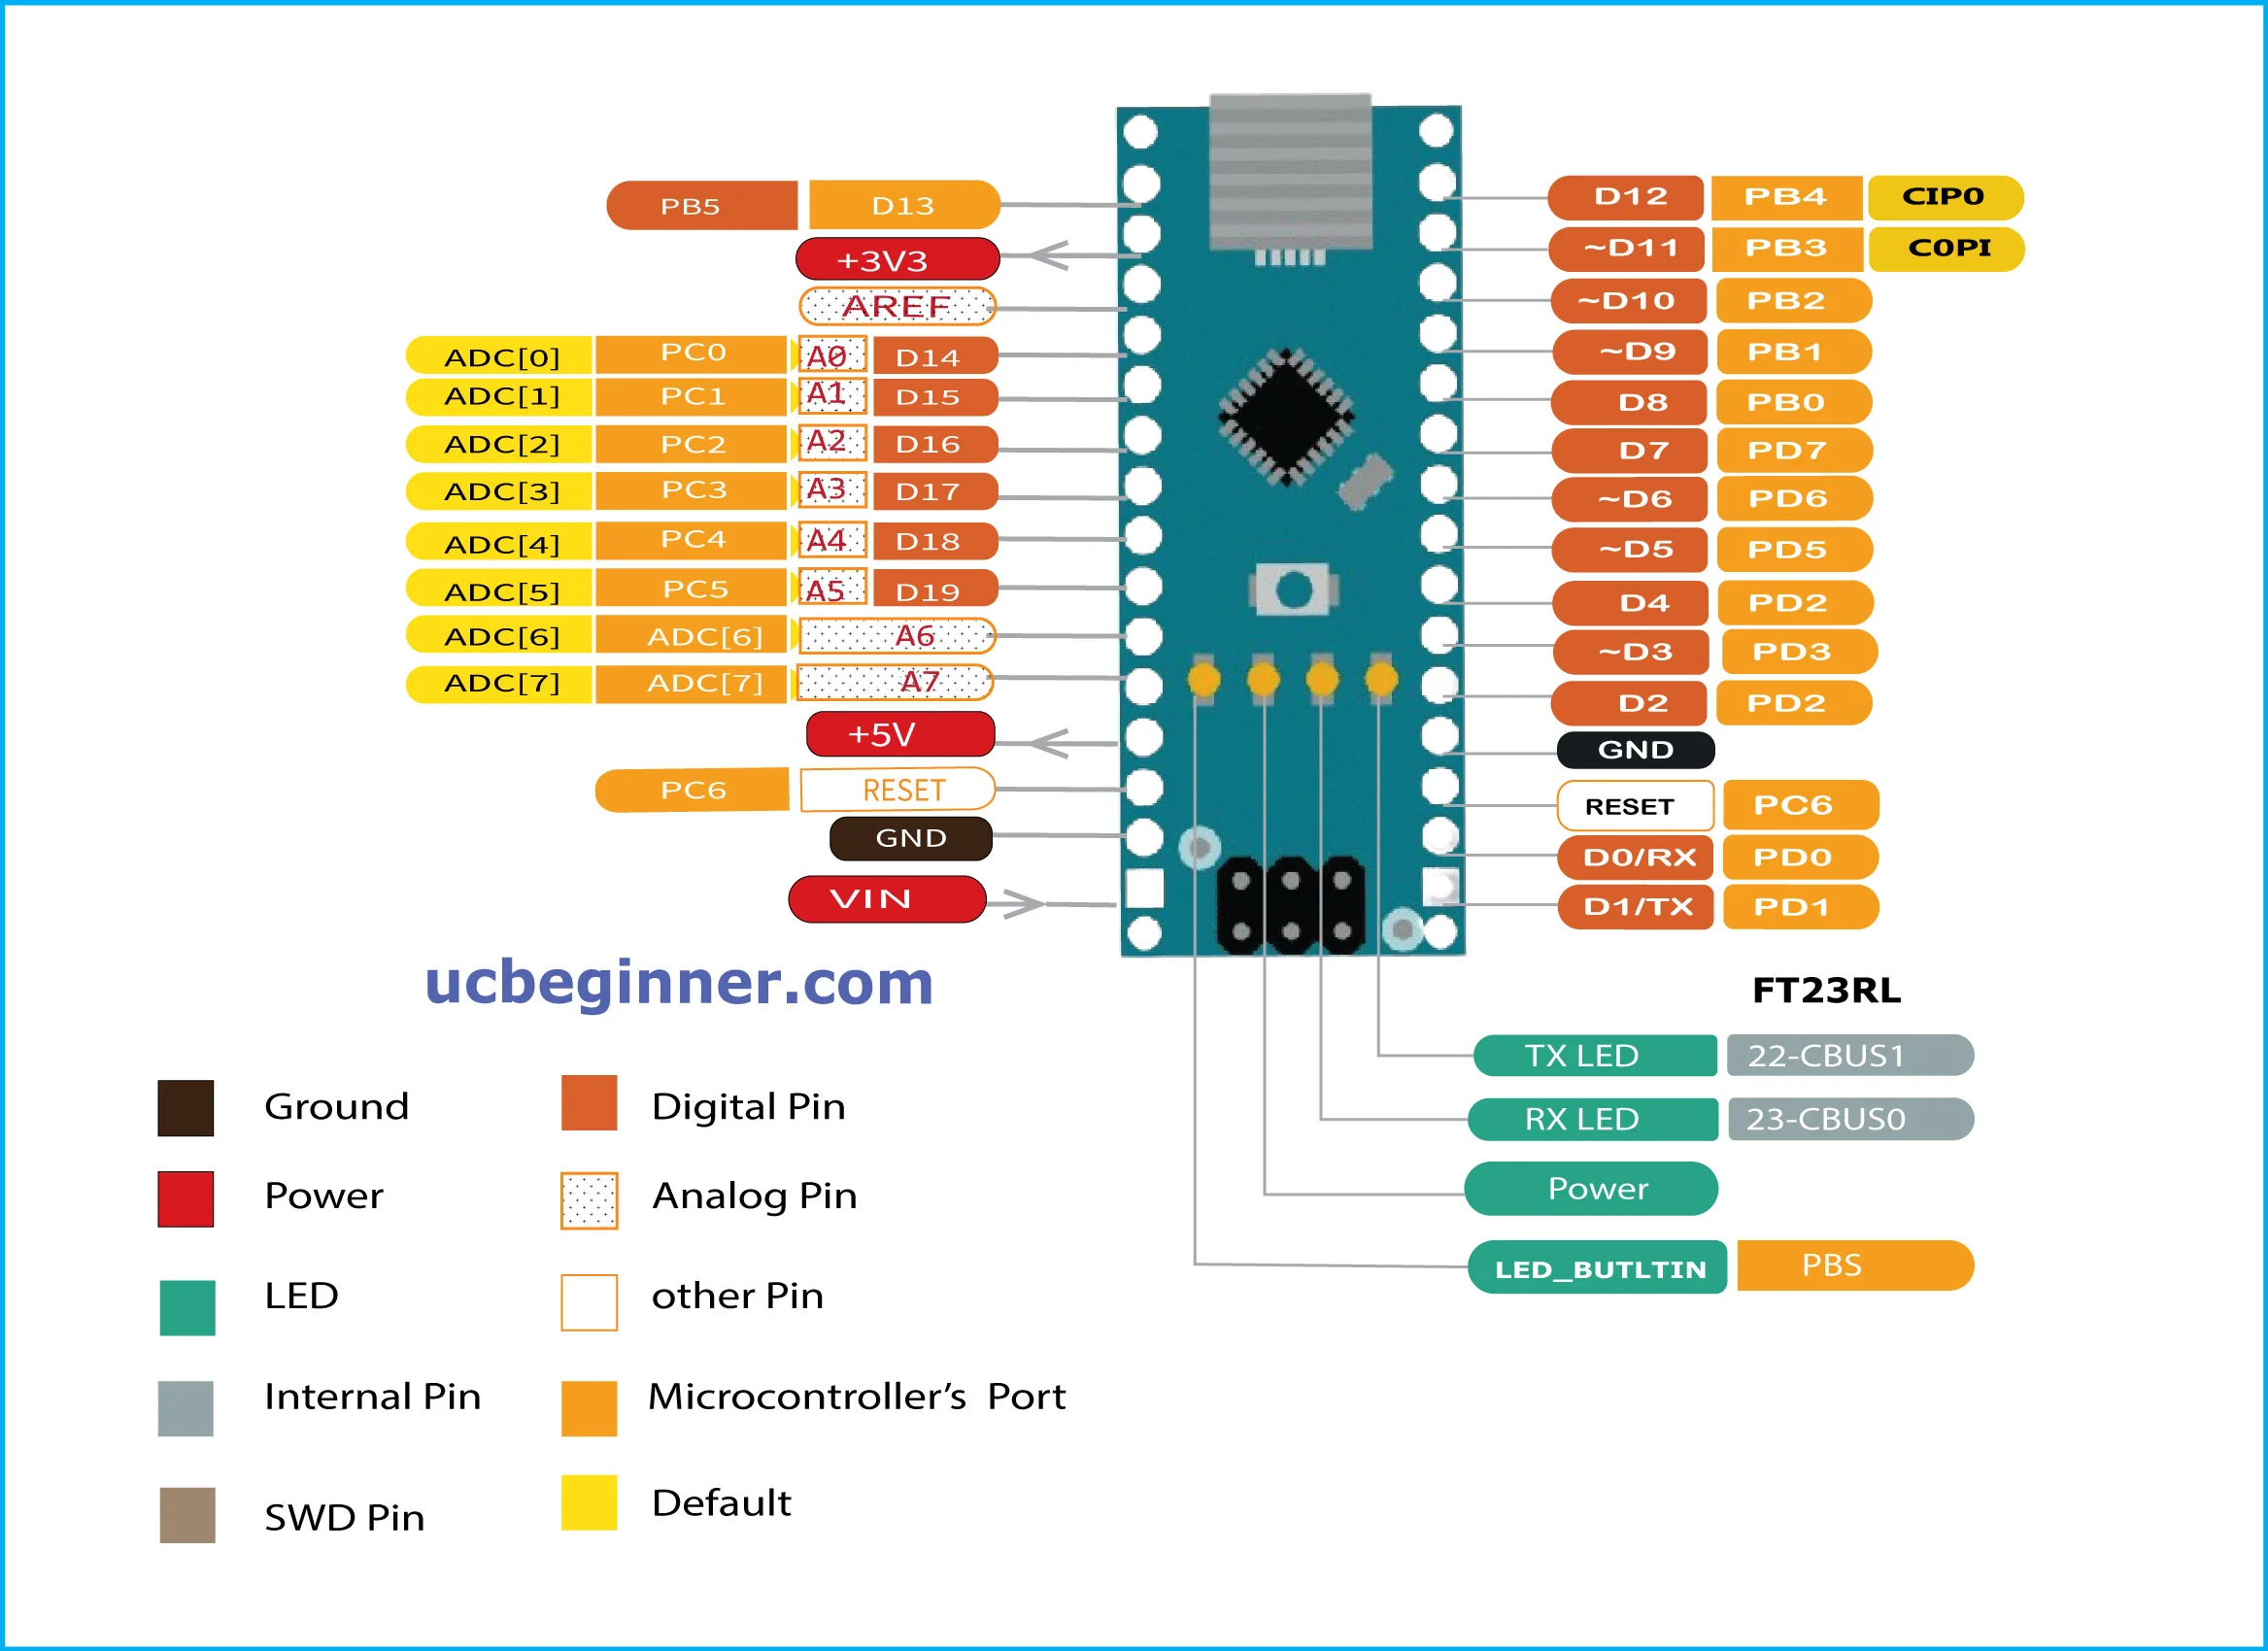
Pin configuration
To effectively connect and use external components and peripherals with the Arduino Nano, it’s important to understand its pin configuration. The Nano has 30 pins, each with a specific function that helps you easily connect and interact with your projects. Learning about these pins will ensure smooth connectivity and interaction within your projects.
Pin Numbers
The Arduino Nano comes with 22 digital pins, conveniently labeled D0 through D13 and A0 through A7. With these pins, you have plenty of options for connecting various sensors, actuators, and electronic devices to the Nano. This versatility allows you to unleash your creativity and develop a diverse range of projects.
Interrupt PINs
On the Arduino Nano, some of the digital pins have the special ability to be set up as interrupt pins. This means that they can quickly react to outside events or signals in your code. These pins usually have “INT” in their labels. By using these interrupt pins, you can make your projects more flexible and responsive by triggering specific actions based on certain conditions.
I2C PINs
The Arduino Nano includes special pins specifically designed for Inter-Integrated Circuit (I2C) communication, known as SDA (data) and SCL (clock). These pins make it simple to connect with I2C-compatible devices like sensors, displays, and other microcontrollers. This allows for smooth sharing of data and collaboration among different components in your project.
SPI PINs
The Nano also supports Serial Peripheral Interface (SPI) communication, which allows for fast and efficient data transfer between the Nano and other devices. This is done through specific pins known as MOSI (Master Out Slave In), MISO (Master In Slave Out), and SCK (Serial Clock). With SPI-compatible devices, you can easily establish high-speed serial communication for seamless integration with the Nano.
PWM PINs
The PWM pins on the Arduino Nano offer a great way to control analog components like motors, LEDs, and servos with precision. By adjusting the duty cycle of the PWM signal, you can easily control the intensity of output signals. This allows for smooth and accurate control of connected devices, making it a valuable tool for your projects.
Arduino Nano Power
Power Consumption
When using the Nano, the amount of power it uses varies based on what you connect to it and the code it’s running. Generally, it consumes about 20mA when the power LED is lit and no components are attached. It’s important to keep this in mind when selecting a power supply.
Power Supply
You have a few options for powering your Arduino Nano:
- Micro USB Cable: It’s easy to use and convenient for both programming and powering from your computer.
- External Battery: Great for projects on the go! Just make sure to use a 5V battery pack with sufficient capacity.
- Regulated Power Supply: This option ensures stable power, which is important for critical applications. Simply connect it to the VIN pin.
Each option has its benefits, so choose the one that best suits your needs.
Power cable
You can confidently power your Arduino Nano using a phone charger cable, as long as it supplies a steady 5V output and enough current. However, it’s important to politely double-check the specifications of both the cable and the charger to ensure they are compatible.
VIN Voltage
Just a friendly reminder: when supplying power to the VIN pin, it’s best to stick to a voltage between 5 and 7 volts. Going above 9 volts could potentially cause damage to your Nano, so it’s best to avoid exceeding that limit. Thank you for your attention to this matter!
Battery
When working on portable projects, you have the option to power your Nano using a 5V battery pack. Just make sure that the battery pack you choose has sufficient capacity to sustain your project for its entire duration.
Arduino Nano Communication protocols
The Nano supports various communication protocols to interact with diverse components:
Arduino Nano I2C
To set up I2C communication with sensors and modules, it’s recommended to use the specific I2C pins labeled A4 and A5 on your board. You can easily achieve this by utilizing libraries such as Wire.h. By following this approach, you can confidently establish reliable communication between your microcontroller and the connected devices.
Arduino Nano SPI
To achieve high-speed communication with devices such as SD cards or LCD displays, I recommend using the SPI pins (10, 11, 12, 13) along with the suitable libraries. This approach will enable efficient data transfer and ensure optimal performance for your project.
Arduino Nano UART
The Nano has UART (Universal Asynchronous Receiver/Transmitter) capabilities, allowing it to communicate serially with your computer or other devices.
Arduino Nano Comparison with other Board
| Feature | Arduino Nano | Arduino Nano Every | Arduino Uno | Arduino Micro |
|---|---|---|---|---|
| Size | Compact | Compact | Larger | Smaller |
| Price | Slightly lower | Slightly higher | Slightly higher | Slightly higher |
| Processor | ATmega328P | ATmega4809 | ATmega328P | ATmega328P |
| Flash Memory | 32KB | 48KB | 32KB | 32KB |
| Analog Pins | 8 | 8 | 6 | 6 |
| Digital Pins | 14 (6 PWM) | 14 (6 PWM) | 14 (6 PWM) | 12 (6 PWM) |
| Communication | I2C, SPI | I2C, SPI | I2C, SPI, UART | I2C, SPI |
| Power | Micro USB, VIN pin | Micro USB, VIN pin | DC power jack, VIN pin | Micro USB, VIN pin |
| Breadboard friendly | Yes | Yes | Yes | No |
| Ideal for | Space-constrained projects, beginners | Projects requiring more memory/processing, beginners | Beginners, larger projects | Small, portable projects |
Where to Buy
Arduino Store, Amazon, digilog
Arduino Nano Code Examples
Reading Temperature Sensor:
Explore sensor integration by reading temperature with an LM35 sensor connected to analog pin A0. This code displays the temperature on the serial monitor:
#include <DallasTemperature.h>

// Define sensor data pin
const int sensorPin = A0;

// Define sensor type
OneWire ds(sensorPin);
DallasTemperature sensors(&ds);

void setup() {
  sensors.begin();
  Serial.begin(9600);
}

void loop() {
  sensors.requestTemperatures(); // Request temperature measurements
  float temperature = sensors.getTempCByIndex(0); // Get temperature from first sensor
  Serial.print("Temperature: ");
  Serial.print(temperature);
  Serial.println("°C");
  delay(5000); // Wait 5 seconds before repeating
}
Controlling Servo Motor:
Add movement to your projects with a servo motor connected to pin 9. This code rotates the servo from 0 to 180 degrees and back:
#include <Servo.h>

Servo myservo;  // Create servo object

void setup() {
  myservo.attach(9);  // Attach servo to pin 9
}

void loop() {
  for (int pos = 0; pos <= 180; pos += 1) {
    myservo.write(pos);  // Set servo position (0-180 degrees)
    delay(15);           // Wait 15 milliseconds before next step
  }
  for (int pos = 180; pos >= 0; pos -= 1) {
    myservo.write(pos);
    delay(15);
  }
}
I2C Communication with LCD
Dive into I2C communication by displaying text on an I2C LCD (e.g., 16×2) connected to pins A4 and A5. This code displays “Hello, World!”:
#include <Wire.h>
#include <LiquidCrystal_I2C.h>

LiquidCrystal_I2C lcd(0x27, 16, 2);  // Define LCD address and dimensions

void setup() {
  lcd.init();                   // Initialize LCD
  lcd.backlight();              // Turn on backlight
  lcd.print("Hello, World!");    // Display message
}

void loop() {
  // Add more functionality in your loop!
}
Bottom Line
If you love hands-on electronic projects but struggle with space or bulky components, the Arduino Nano is your solution. It’s small yet powerful, revolutionizing your approach to electronics. With its compact design and versatile capabilities, the Nano lets you unleash your creativity without compromise. Whether you’re experienced or new to DIY electronics, the Nano is your perfect companion for bringing ideas to life. Say goodbye to limitations and hello to endless possibilities with the Arduino Nano by your side.